4 Poses for Building Bone Strength
Beverly Davis-Baird | DEC 22, 2024

While we age, it’s normal to lose some bone mass. However losing an excessive amount can lead to fractures of the hip and spine, loss of height, rounding of the upper back, and limited mobility. Unfortunately, bone loss comes without warning signs or symptoms. That is why osteoporosis is often referred to as the “silent disease.”
If you’ve been diagnosed with osteoporosis or osteopenia, you know that doctors recommend weight-bearing exercises as part of the treatment. Yoga offers many poses that are ideal for building bone strength.
Yoga for Stronger Bones
Below are four poses proven to help improve bone strength. For your safety (and to ensure the greatest bone-building benefit) keep these guidelines in mind:
- Use a wall or the back of an inward-swinging door to support both balance and good posture.
- Move in and out of each pose 4-6 times before holding the pose for 30 seconds (or roughly four to six breaths).
- If holding the poses for the recommended time isn’t possible, stay in each pose for a long as you are able and gradually increase your hold time as you gain strength.
- Consistency is important, so aim to practice these four poses at least four times a week
4 Bone Building Yoga Poses
1) Tree Pose (Vriksasana)
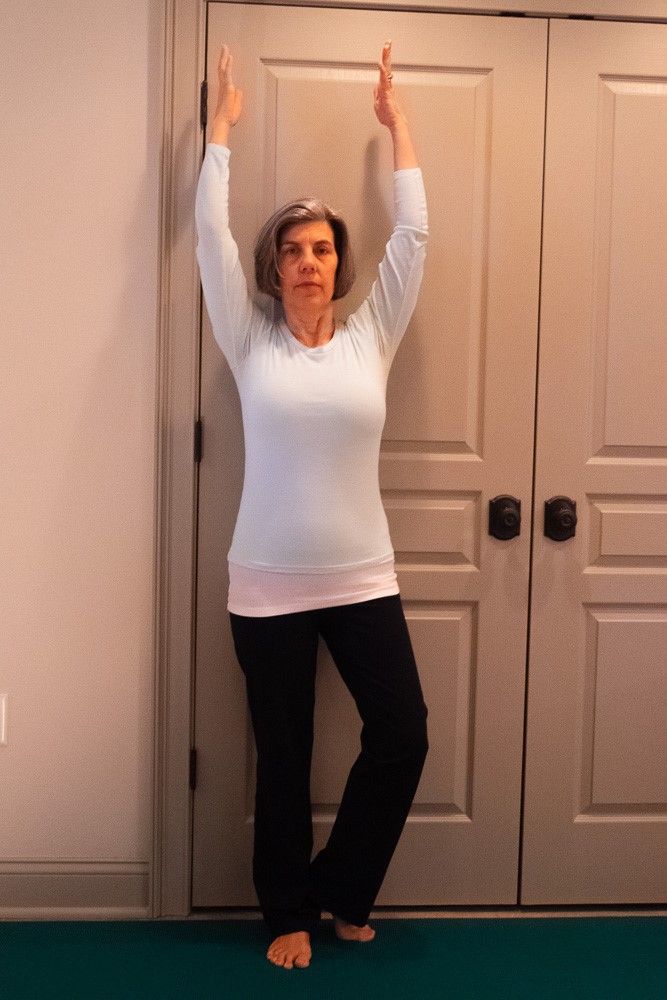
1. Begin in Mountain Pose with your back to a door or wall. Your heels should be approximately one to two inches from the wall.
2. Shift your weight into the right leg. Take care to lengthen through your entire right side to keep the right hip from shifting to the right.
3. Bend the left knee and rotate it outward. Bring the left heel to rest on the inner right ankle with your toes on the floor (like a kickstand on a bicycle). Another option is to bring the sole of your right foot onto your right calf so you are balancing on your right leg.
4. Reach both arms up to the ceiling. If your shoulders are tight or you have limited shoulder movement, try bending your elbows into goalpost arms.
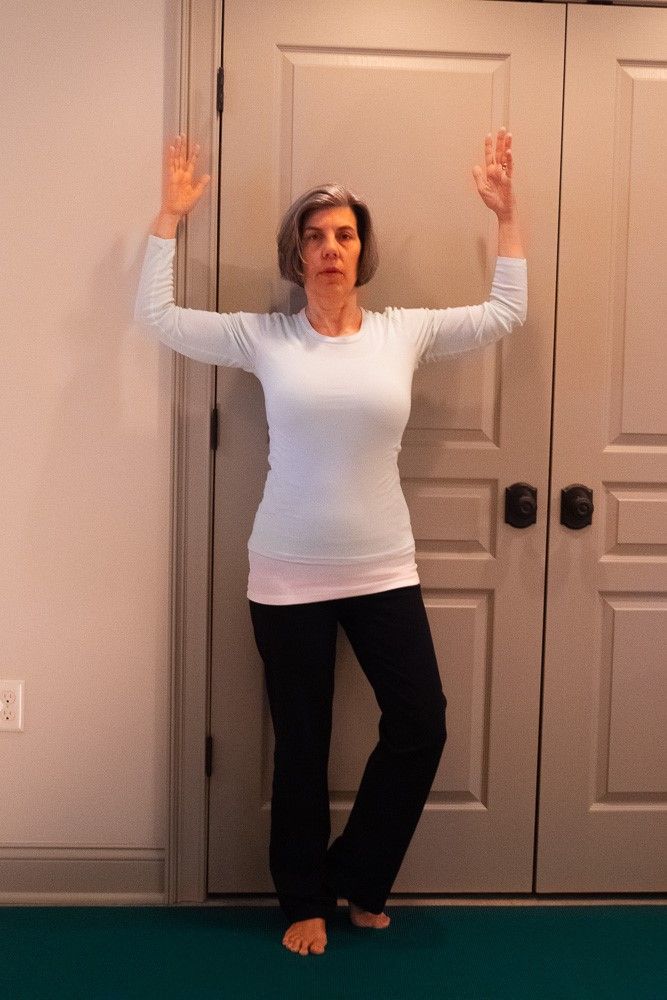
5. Stay in the pose for six breaths. With each inhale, imagine lengthening your spine and lifting your rib cage away from your waist.
6. To come out of the pose, release your left foot to the floor and lower your arms. Remember to repeat on the left.
2) Warrior II (Virabhadrasana II)
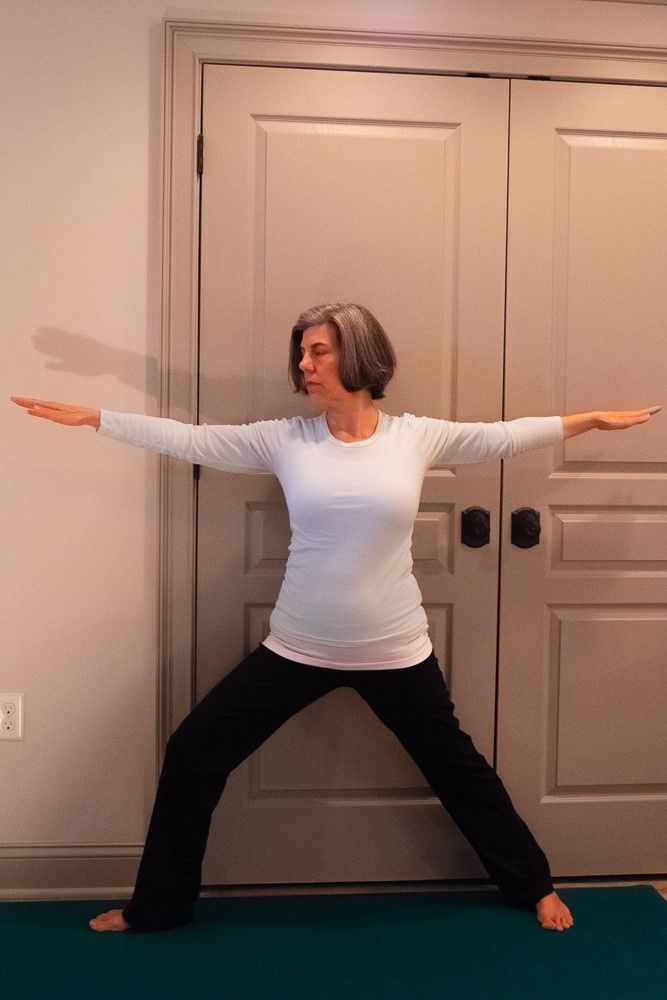
1. With your back still to the wall, step your feet 3-4 feet apart. Rotate your right foot so it is parallel to the wall. Turn your left foot in about 20 degrees.
2. Bend your right knee deeply, checking that the kneecap aligns with your second and third toes. The knee should be stacked directly over your ankle. If your knee goes past your ankle, widen the distance between your legs.
3. Inhale your arms out to the sides, level with your shoulders. Your palms will face down. Pause and hold this position for one breath. Then, on an exhale, lower your arms and straighten your right knee.
4. Move in and out of the pose four times. Then stay with the knee bent and arms extended for six breaths. As you hold the pose, focus on lengthening the spine with each inhale and sinking your weight into your legs on each exhale.
5. Allow the arms to lower as you straighten the right knee. Turn your feet forward and then pivot to the left and repeat.
3) Chair Pose (Utkatasana)
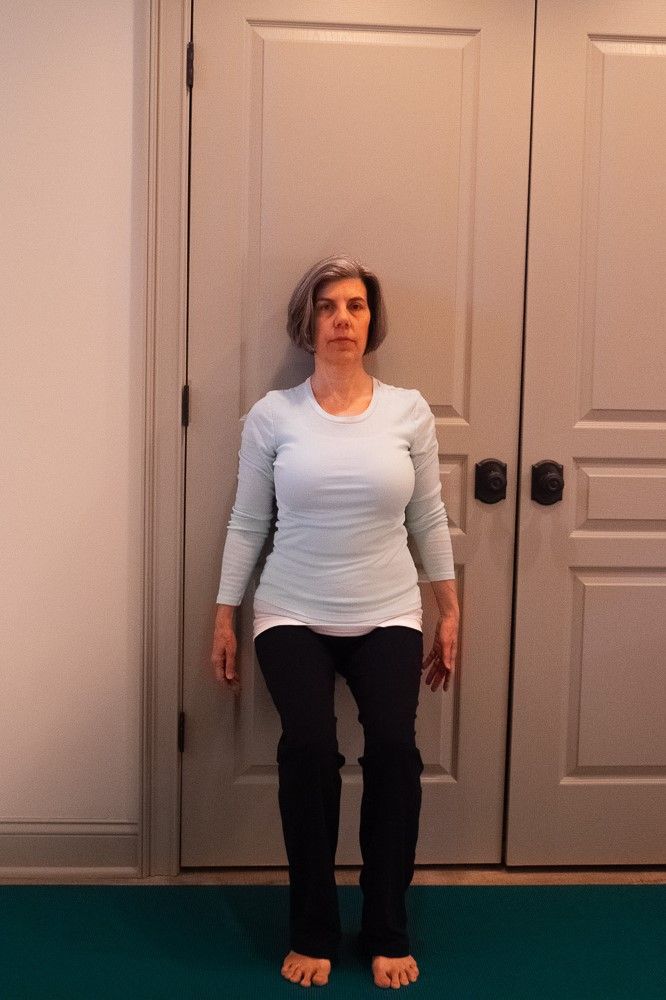
1. Beginning in Mountain pose again, press your back into the wall as you lengthen through the crown of your head.
2. Start to walk your feet forward, bending your knees as your back slides down the wall into a seated position. Bring the knees to a 90-degree angle (or as close as you are able).
3. Hold this position for six breaths. Continue to press your spine and the back of your head into the wall.
4. To come out, bring your palms to the wall for support and slowly walk your feet towards the wall, sliding your spine upward to return to a standing position.
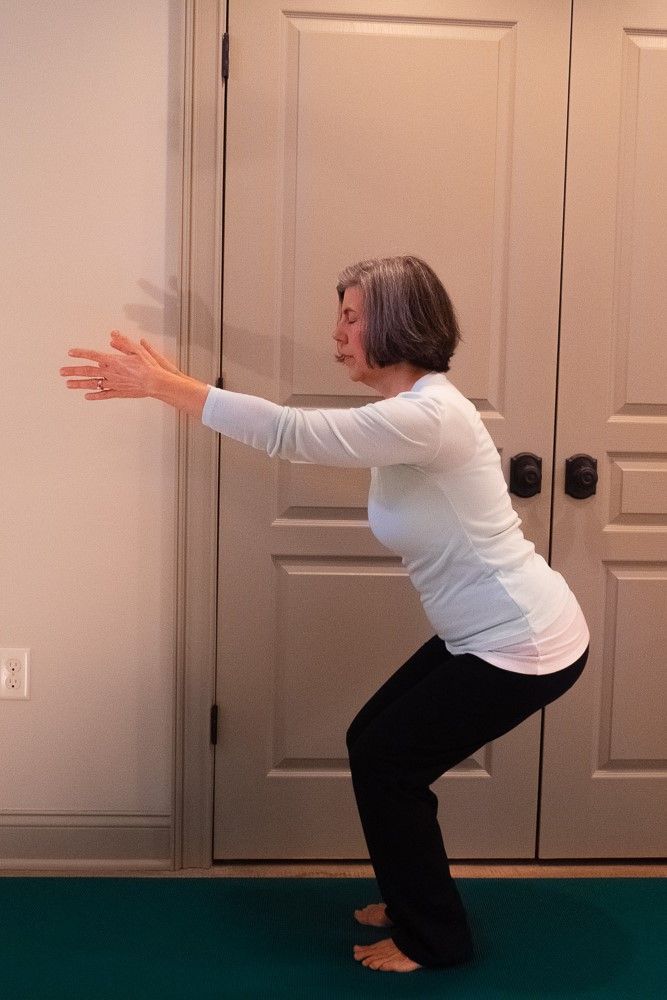
*Practice Tip: Challenge yourself by stepping away from the wall. Lift your arms in line with your chest or even overhead. Try moving dynamically in and out of the pose for a few reps before staying for six breaths.
4) Triangle Pose (Trikonasana)
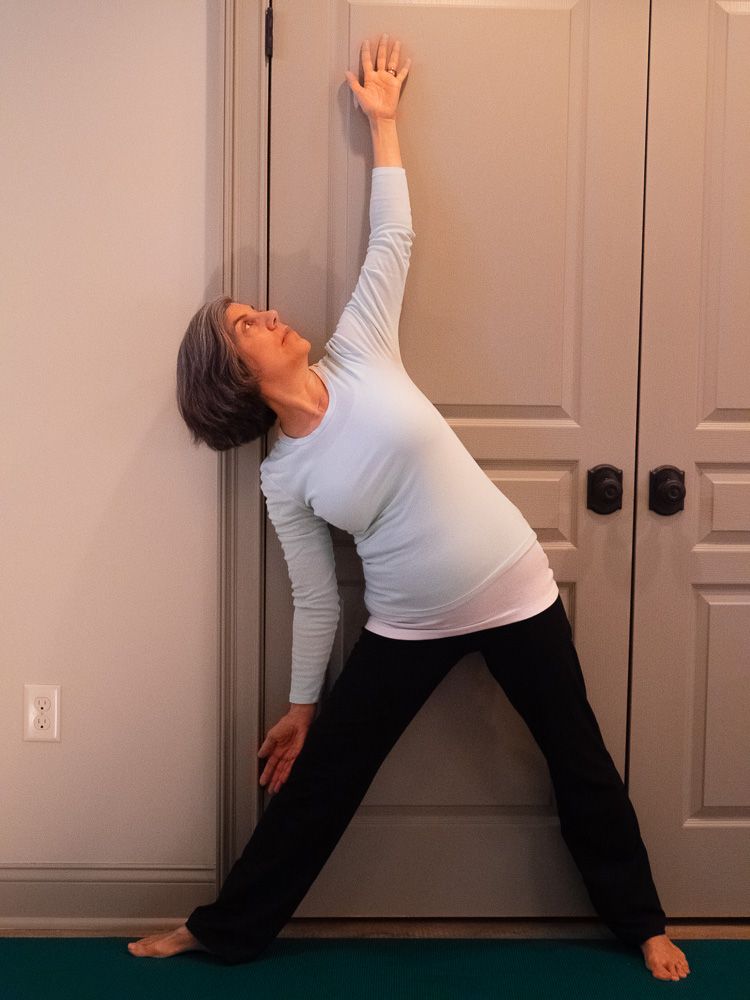
1. With your back to the wall, step your feet 3-4 feet apart. Turn your right foot so it is parallel to the wall and angle the left foot in a few degrees. Extend both arms to your sides in line with your shoulders.
2. Without bending your knees, shift your hips to the left as you reach your right arm to the right. Imagine reaching across a countertop as you continue to lengthen both sides of your torso.
3. Lower the right hand to your thigh (or calf) and reach the left arm towards the ceiling. The back of your left hand may come to the wall but don’t try to force it.
4. Engaging the muscles of your lower belly, rotate your ribs up and away from the floor. Gaze straight ahead or look up toward the ceiling. Continue to reach the left arm upward as you hold the pose for four to six breaths.
5. Slow inhale back to center. Reposition your feet and repeat to the left.
To complete this sequence, reward yourself with a few minutes of relaxation. You can lie flat on the floor or sit in a chair. Close your eyes and take five deep, relaxing breaths. Know you’re getting stronger every day.
For more ways to strengthen our bones, check out this class:
"Strong and Fit: Yoga with Weights."
Be well!
published, 2/22/21; updated 12/22/24
_______________________________________
Wisdom Tree Yoga’s goal is to share the transformative benefits of yoga with real people living with real-life challenges. We welcome students of all levels, offering a safe, supportive environment that is inclusive, accessible, compassionate, and joyful. Join us, follow us, and stay in touch with us by clicking HERE.
Beverly Davis-Baird | DEC 22, 2024
Share this blog post
